


We love to put finishing touches on our packs (and sometimes apparel) by adding patches we pick up during travel, so we put together three "how-to" tutorials depending on your time and confidence with a needle and thread (or a sewing machine).
We'd love to see how you customize your Topo Designs products! Once you've created your masterpiece, take a picture, share it and tag us @topodesigns!
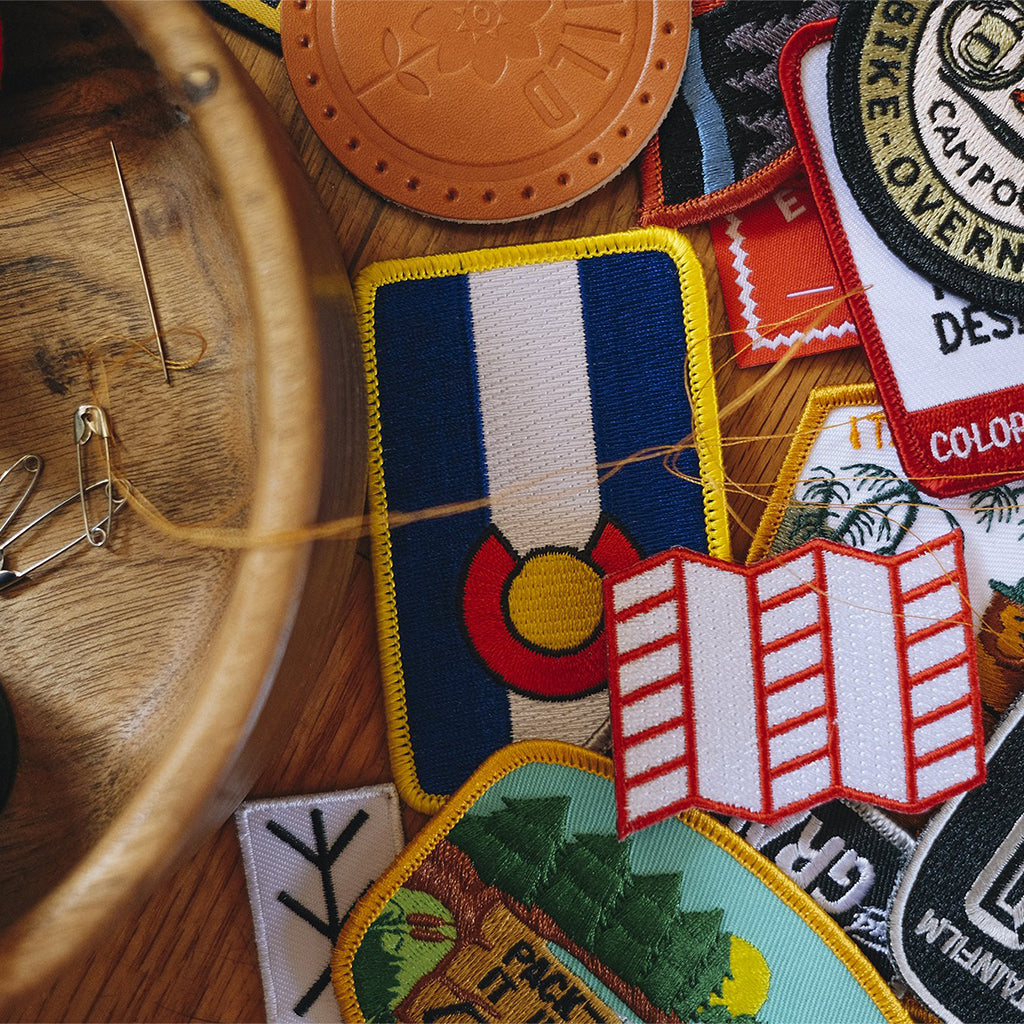
Customize and sew by hand
Although this method of attachment is the most time consuming, it is also the cheapest and will offer the largest sense of accomplishment after you're finished!
Difficulty: Moderate
Cost: Low
Time: 20-30 minutes per patch
Supplies: needle, thread, safety pins, patches and scissors
Steps
1. Choose your thread for each patch. There are two schools of thought here: 1) To match the patch border so the stitches disappear or 2) Choose a thread that contrasts and stands out. There is no right or wrong way; it's all a matter of personal preference.
2. Decide where you want the patch to be attached on your bag. Note: a placement further down near the seam or in an area where there is padding will make it harder to sew the patch on.

3. Safety pin the patch in place. This will help ensure the patch stays put while you sew and your final placement will be where you wanted it.
4. Cut 16-20" of thread and fold it in half. Push the two loose ends of thread through the eye of the needle. The two loose ends should be shorter, about 3-4" long, with the folded end hanging longer.

5. From the outside of the bag where your patch is now pinned into place, push the needle straight through the edge of the patch to the inside of the bag and pull the needle and thread ALMOST the entire way through (leaving about a 1" loop visible on the top).

6. From the inside of the bag, push the needle straight back through the patch towards the outside in either of the two ways: 1) From the area just outside of the patch and then down through the patch edge in an overcast stitch or 2) Along the inner edge of the patch creating a running stitch.
7. Send the needle and thread through the loop you kept visible from your first stitch and pull the needle and thread tight to secure it.
8. Stitch around the remaining area of the patch either of the two ways: 1) Over the edge of the patch or 2) Along the inner edge of the patch border.

9. Once you have sewn around the entire patch (or are out of thread), use a simple overhand loop to finish by pushing the needle through the outside to the inside of the bag, but not pulling the thread tight. Push the needle back through to the outside of the bag and pass the needle through the loop you just created. Then pull tight and repeat 2-3 times to secure the knot.
10. If the patch is not completely attached, use steps 4-9 again until you have finished.
11. Remove safety pin.

12. Show off your hard work!
Customize and machine sew yourself
This method is one of the fastest (and most secure) ways to attach patches, but is more limiting than others as you can only sew patches on areas that you can access with the machine.
Difficulty: Moderate
Time: 5 minutes per patch
Cost: Low (if you or someone you know has a sewing machine)
Supplies: sewing machine, thread, safety pins, patches and scissors
Steps
1. Choose thread for each patch, there are two schools of thought here: 1) To match the patch border so the stitches disappear or 2) Choose a thread that contrasts and stands out. There is no right or wrong way, it's all personal.
2. Decide where you want the patch to be attached on your bag. Note: a placement further down near the seam, or in an area where there is padding will make it harder to sew the patch on.

3. Safety pin the patches in place. This will help ensure the patch stays put while you sew and your final placement will match where you wanted it.
4. Check to be sure that you can get the bag under the presser foot of the machine where the needle is located—some parts of the bag may be too thick to fit. Make sure that you only have a single layer of the bag, you don't want to sew the bag shut!

5. Thread the sewing machine with your thread of choice (including bobbin color).
6. Select a straight stitch on the machine, align the needle with the inner border of the patch and lower your presser foot.

7. Back-stitch for 2-3 stitches to secure the thread, and then sew along the inner edge of border on the patch.

8. If your patch is circular you'll need to turn the bag and patch as you sew, following the border of the patch. If your patch has straight edges, like a square or rectangle, sew straight towards your first corner and then, making sure your needle is down through the patch and bag, lift the presser foot up and swivel the bag 90 degrees on the corner using the needle as an anchor. Put the presser foot down and sew along your next straight edge, repeating the process for each corner.
9. When you have reached the spot where you began sewing, back-stitch for 2-3 stitches again.
10. With your needle in the highest position, raise the presser foot and remove bag from the sewing machine.
11. Trim excess thread.
12. Remove safety pin.
13. Admire your amazing creation.
Customize and take to your local tailor
This method is the easiest if you don't have the time or interest in attaching patches yourself. You can still have a say on location and thread color, etc., you just won't have the battle wounds to show for it.
Difficulty: Easy
Time: TBD
Cost: Depends on the size of the patch, but around $5-$7 per patch is standard.
Supplies: safety pins & patches
Steps
1. Find a local tailor shop that can attach patches for you.
2. Once you find someone to work with, partner with the tailor to decide if they will be hand sewing or machine sewing patches onto the bag.

3. Depending on attachment method, work with tailor on "style" of stitching, refer to steps 1-3 above for methods in attaching.
4. Leave the rest to the professionals.

5. Pick up your bag and take full credit for the hard work.


